Xcode - Renaming a watchOS project. The complete way!
April 9, 2026
Rename Everywhere
Renaming a project should be as simple as a quick right click and rename, right? Unfortunately, there is a bit more to it than that. There are multiple places where a project name can be found. For a complete rename, all of these name instances need to be changed. For a small project, it may be quick to just create a new project with a new name, and migrate some files. However, for big projects this is not a convenient option. This guide will help you fully rename your project.
Let’s Get To Work
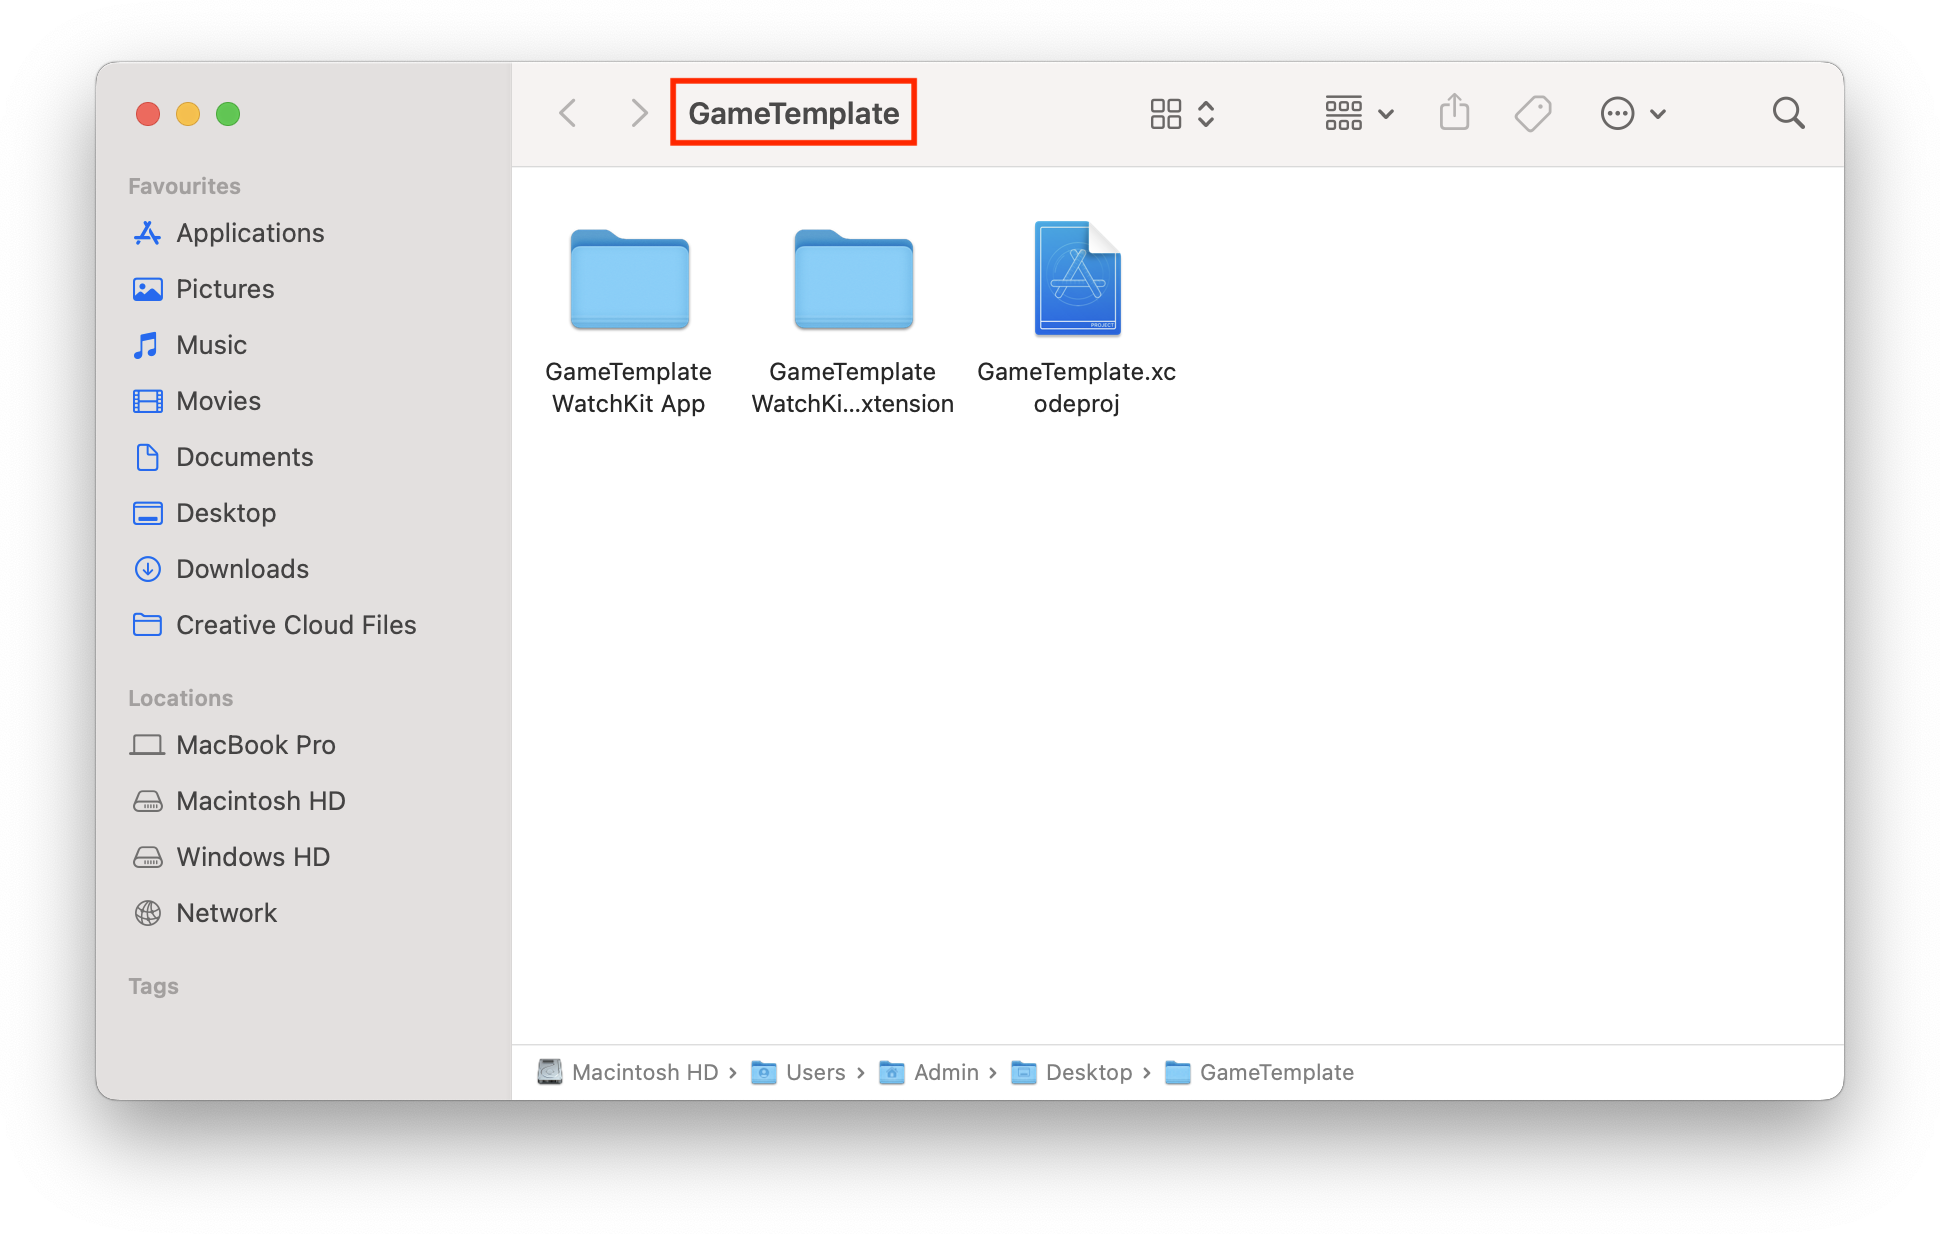
- Rename the root project folder and open the project in Xcode.
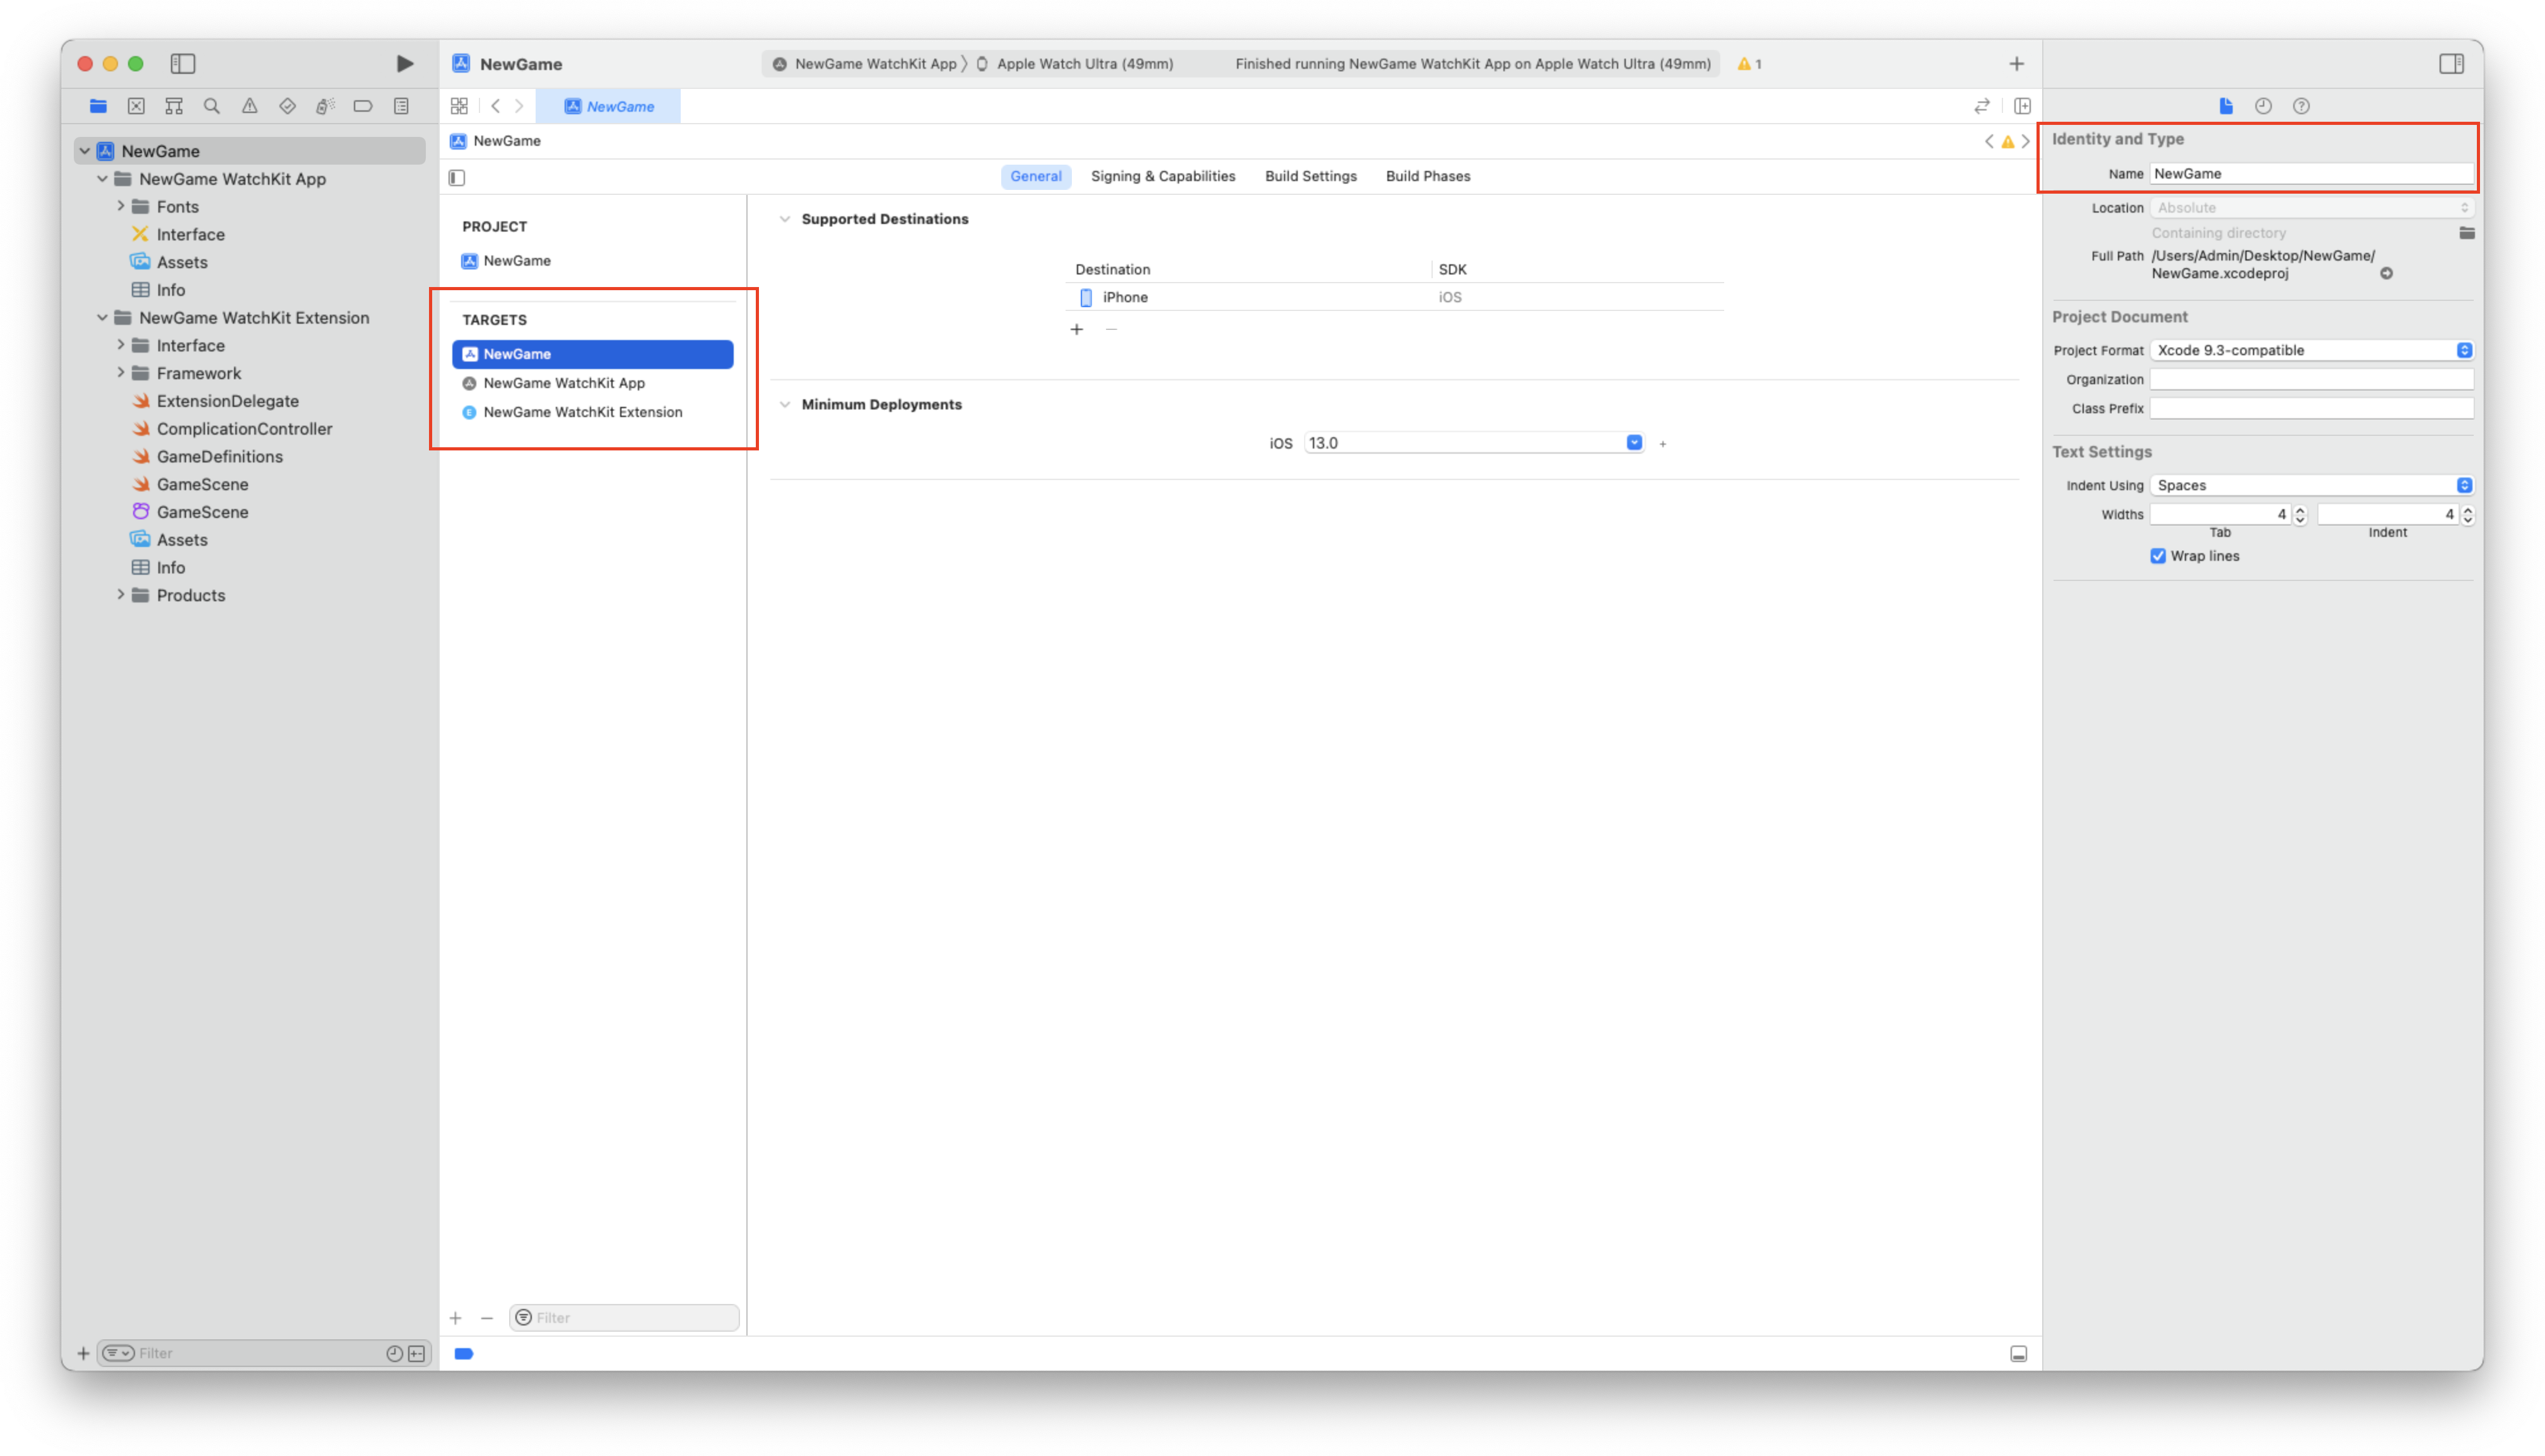
- Select the first target and change the identity name. This will also rename the other targets and project name.
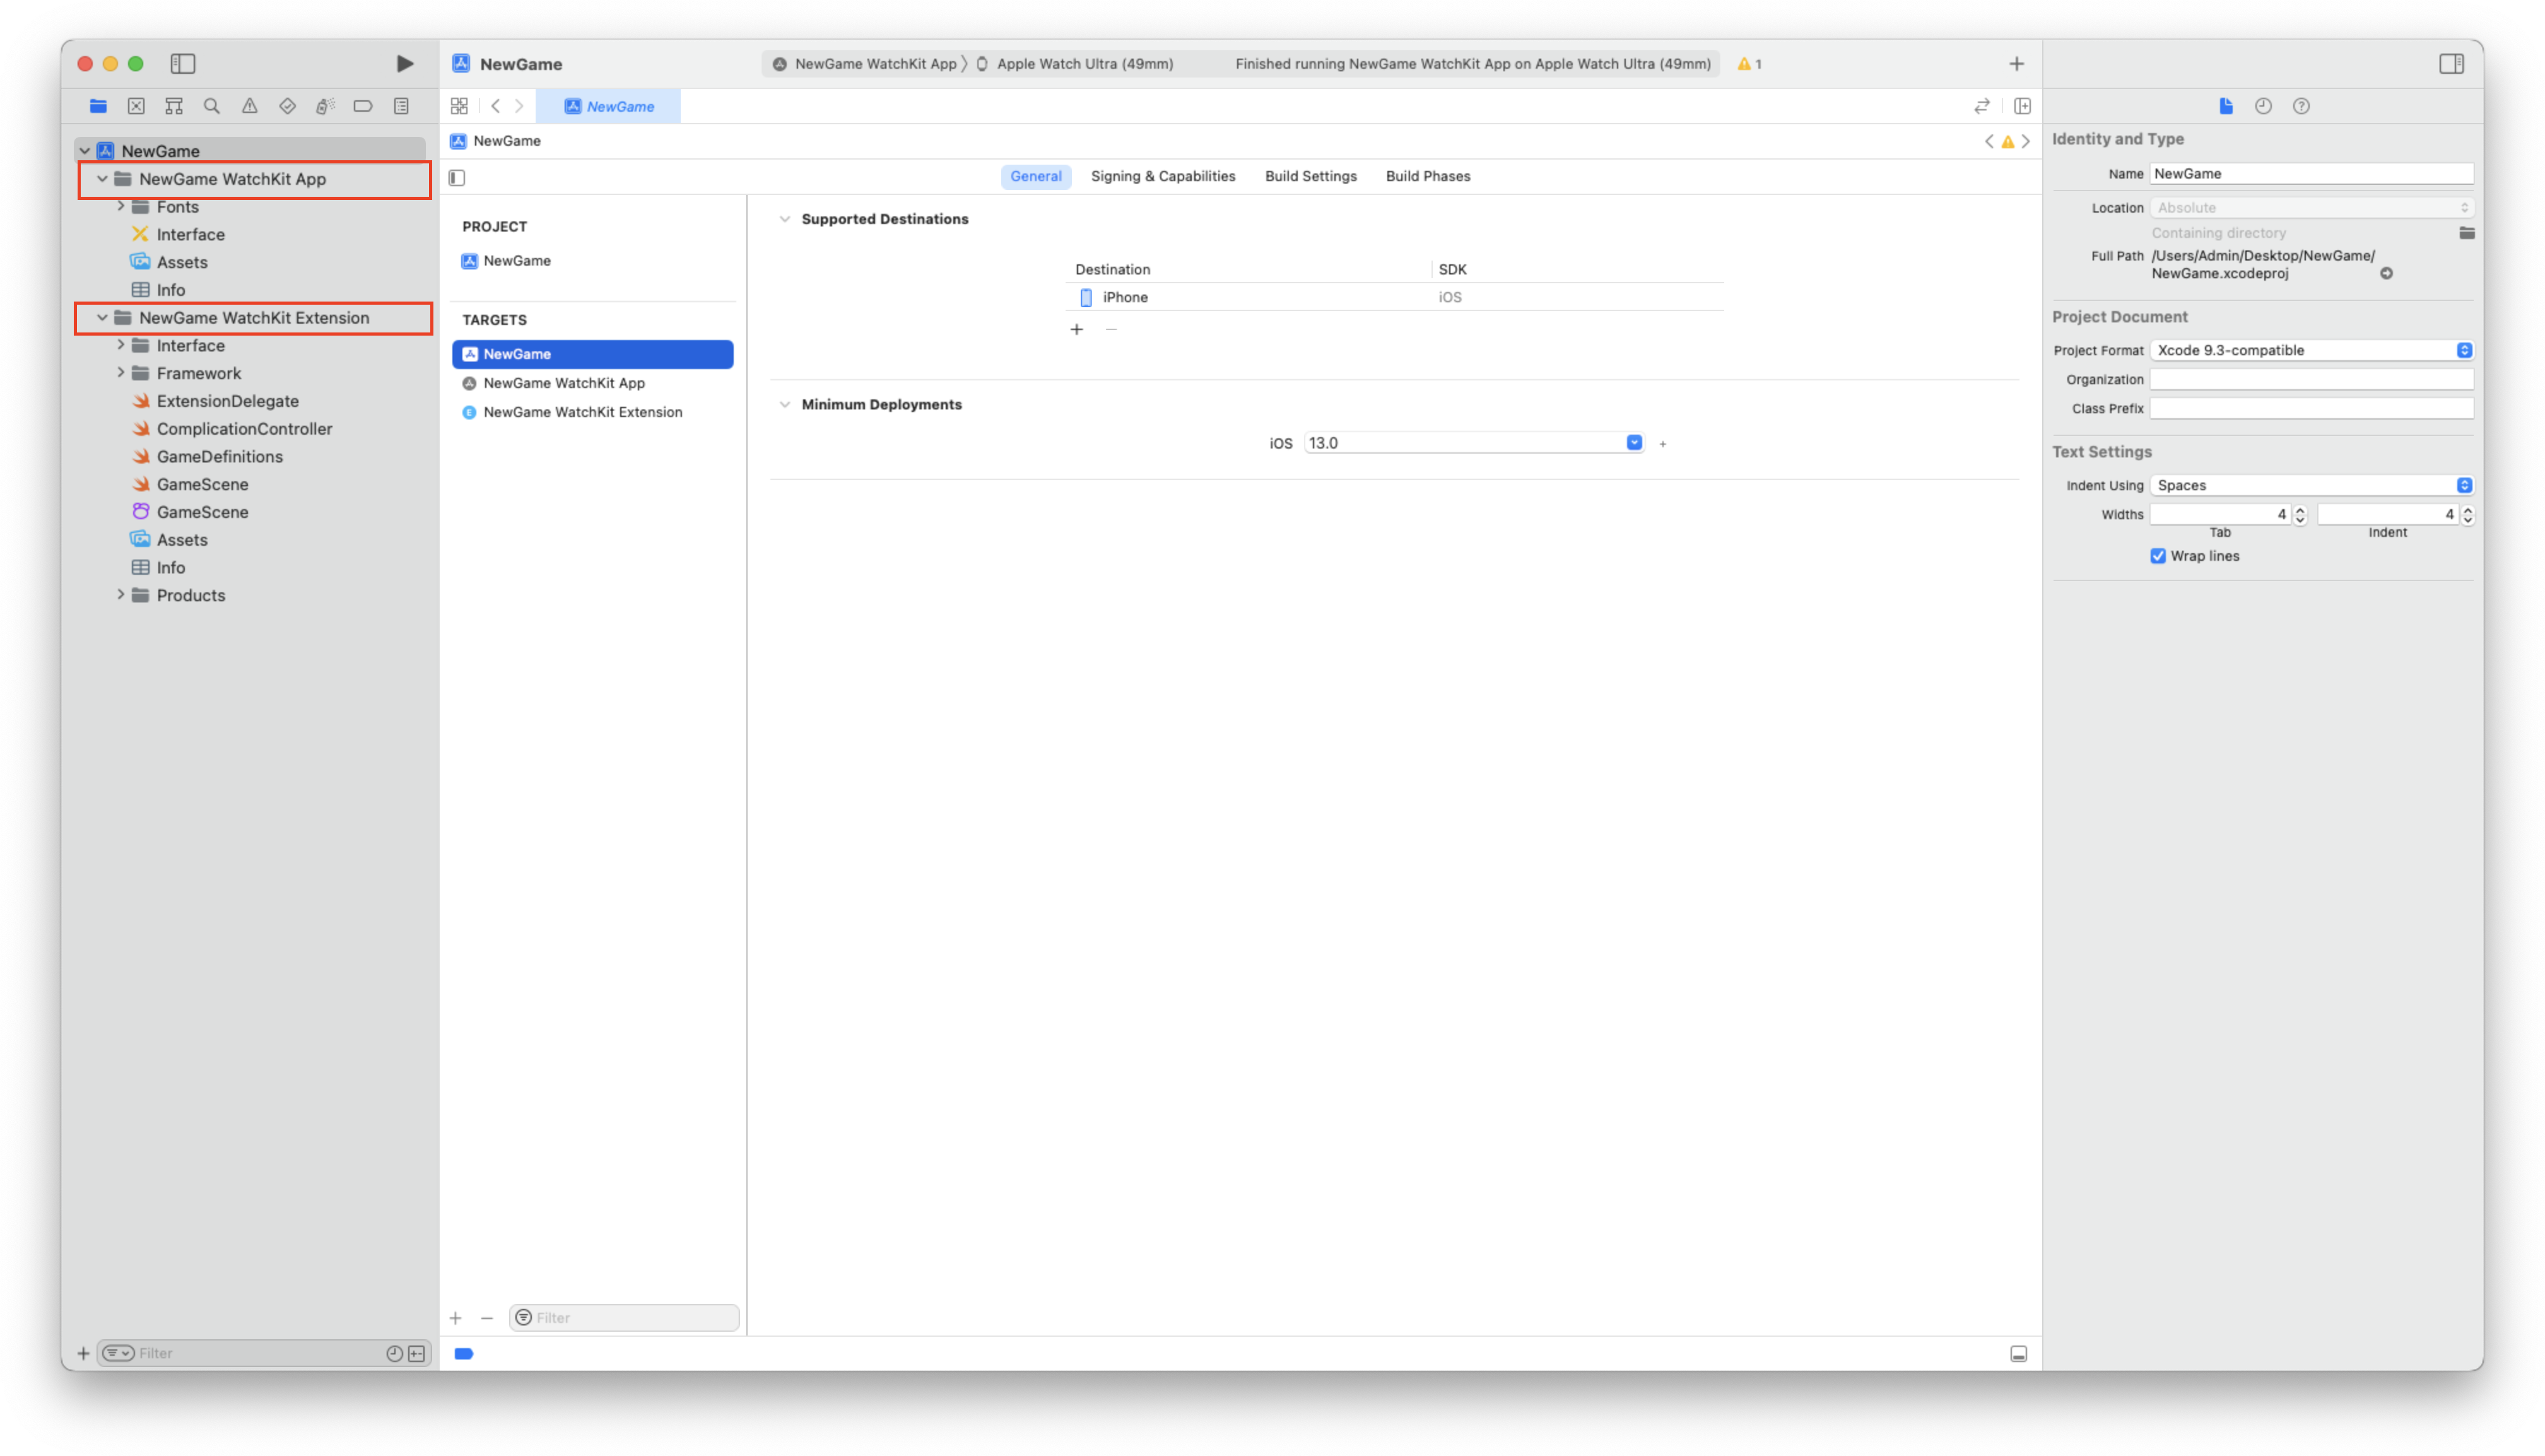
- Rename the App and Extension folder names.
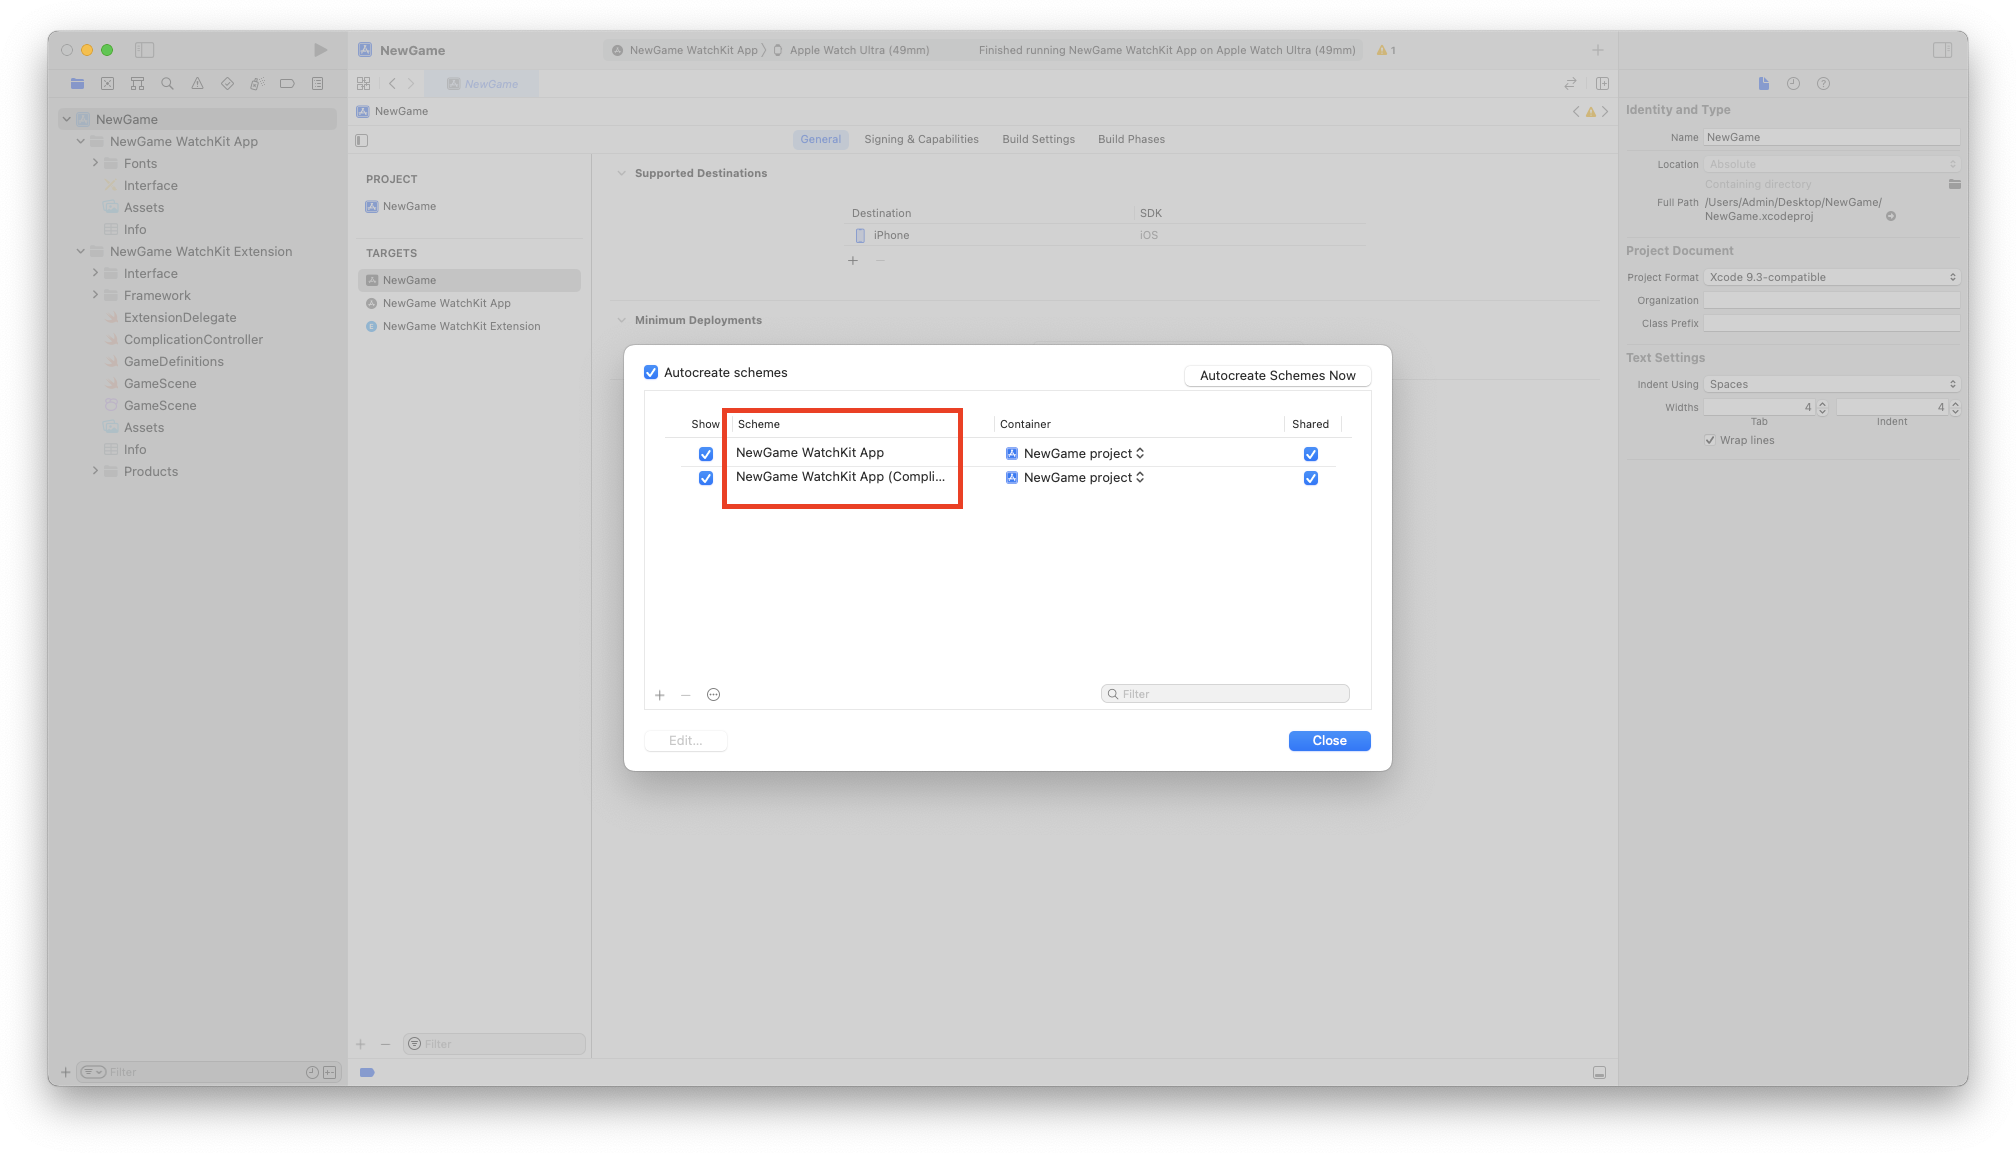
- Edit the scheme and change the 2 names.
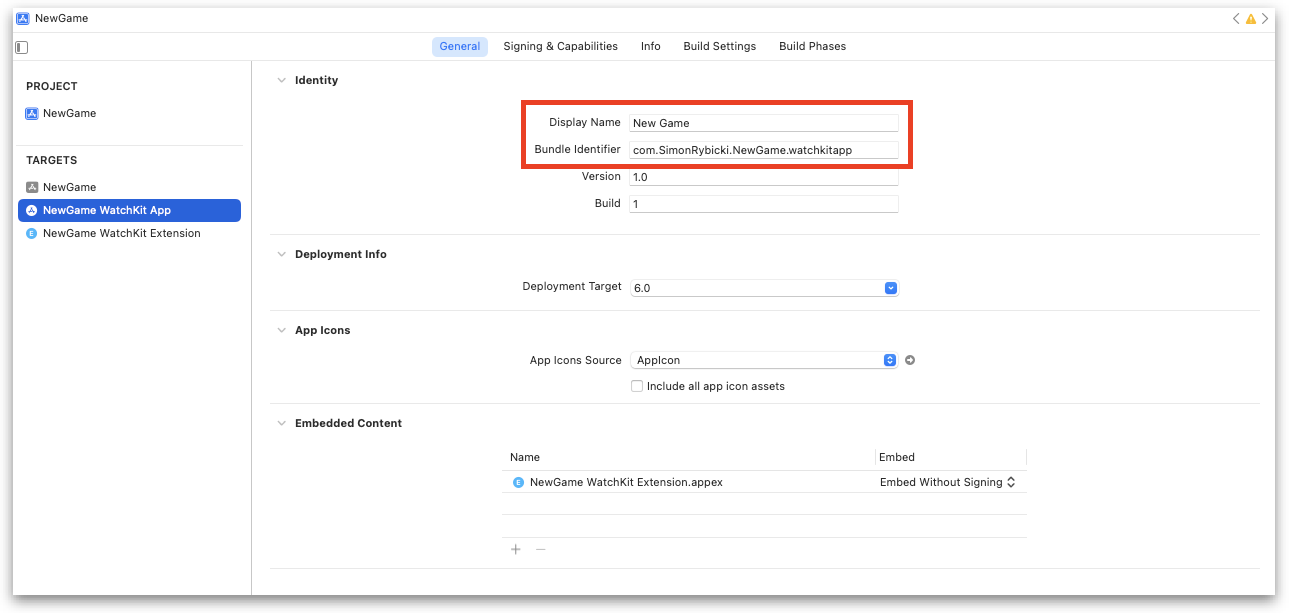
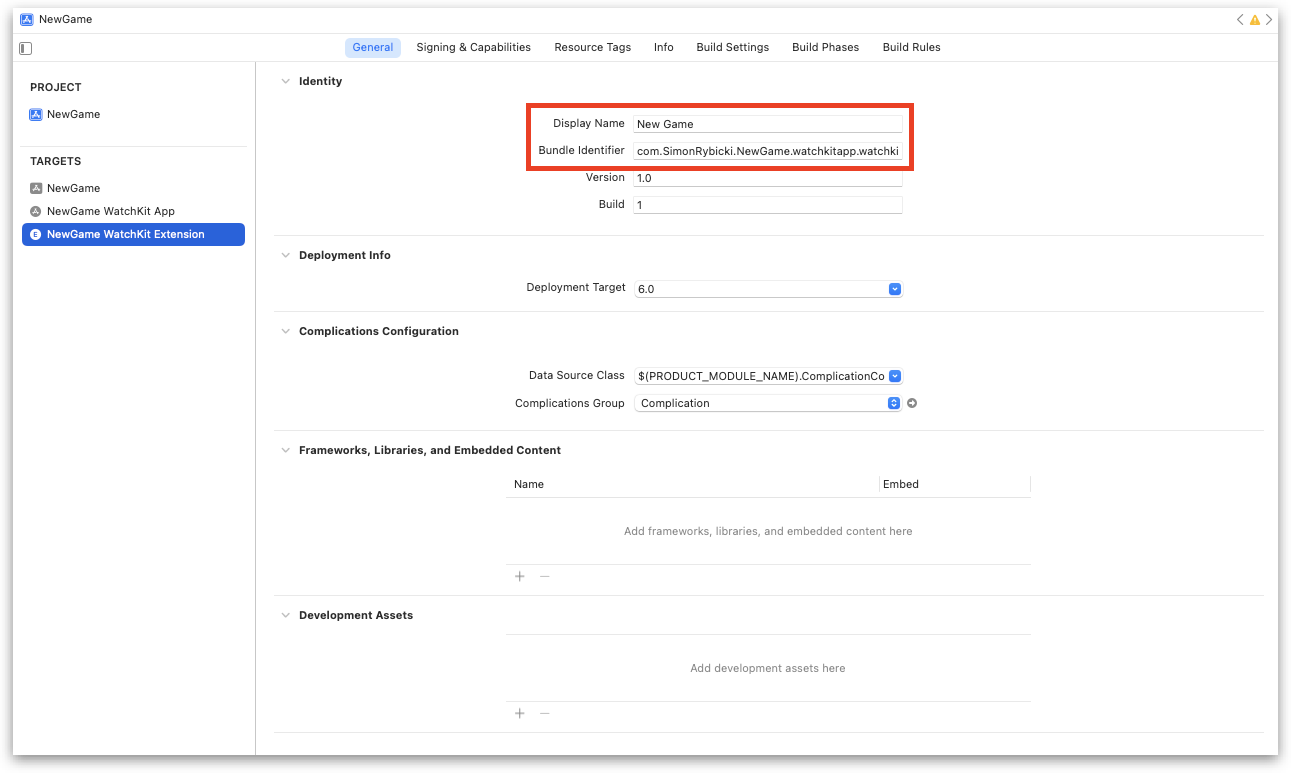
- Change the display and identity names of the App and Extension targets.
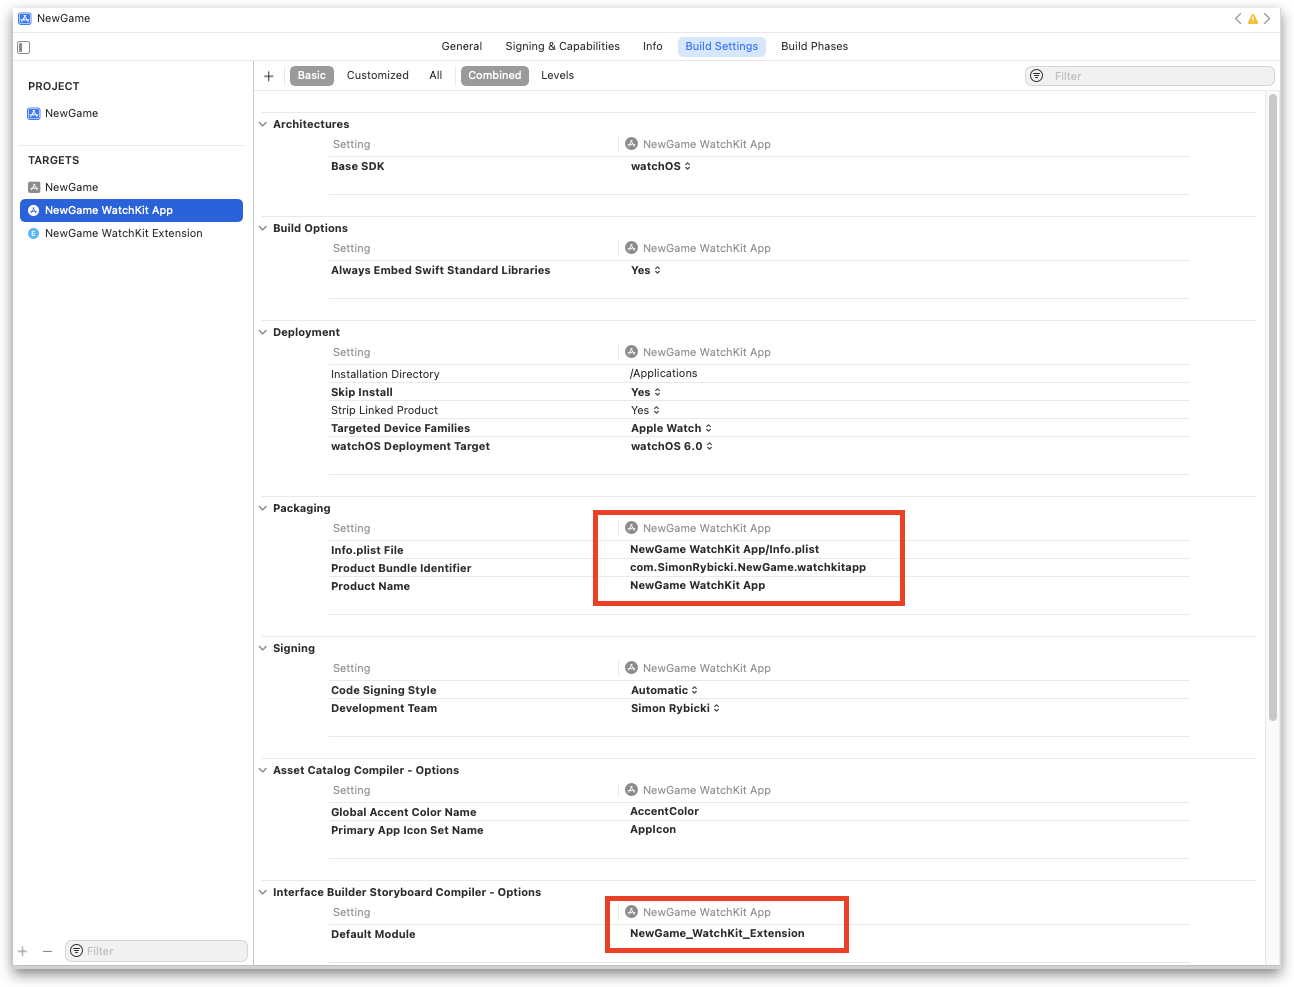
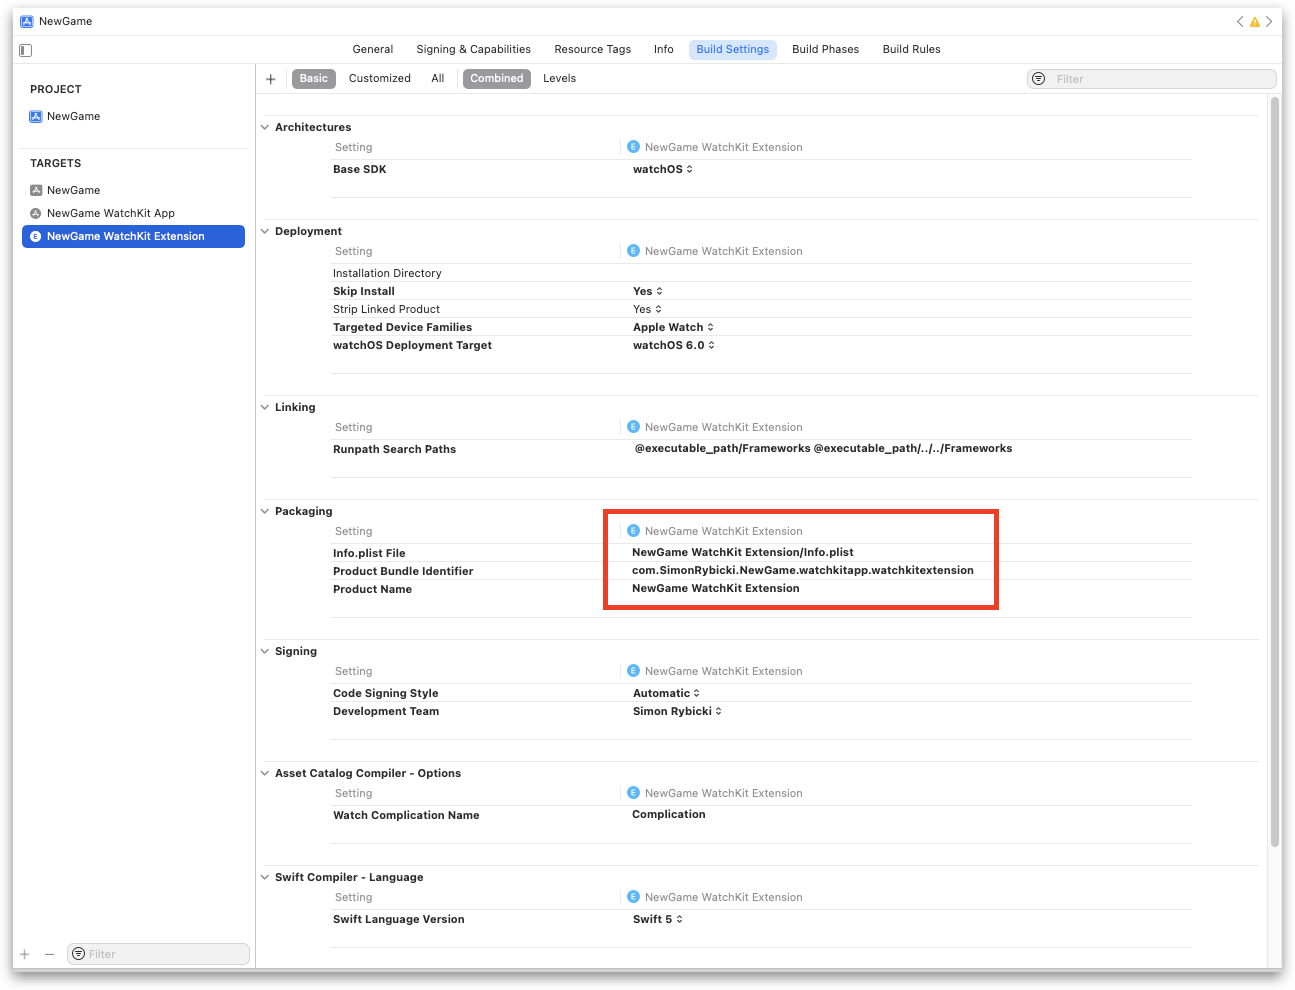
- Find and replace any of the old names under the Build Setting tab, for both App and Extension targets.
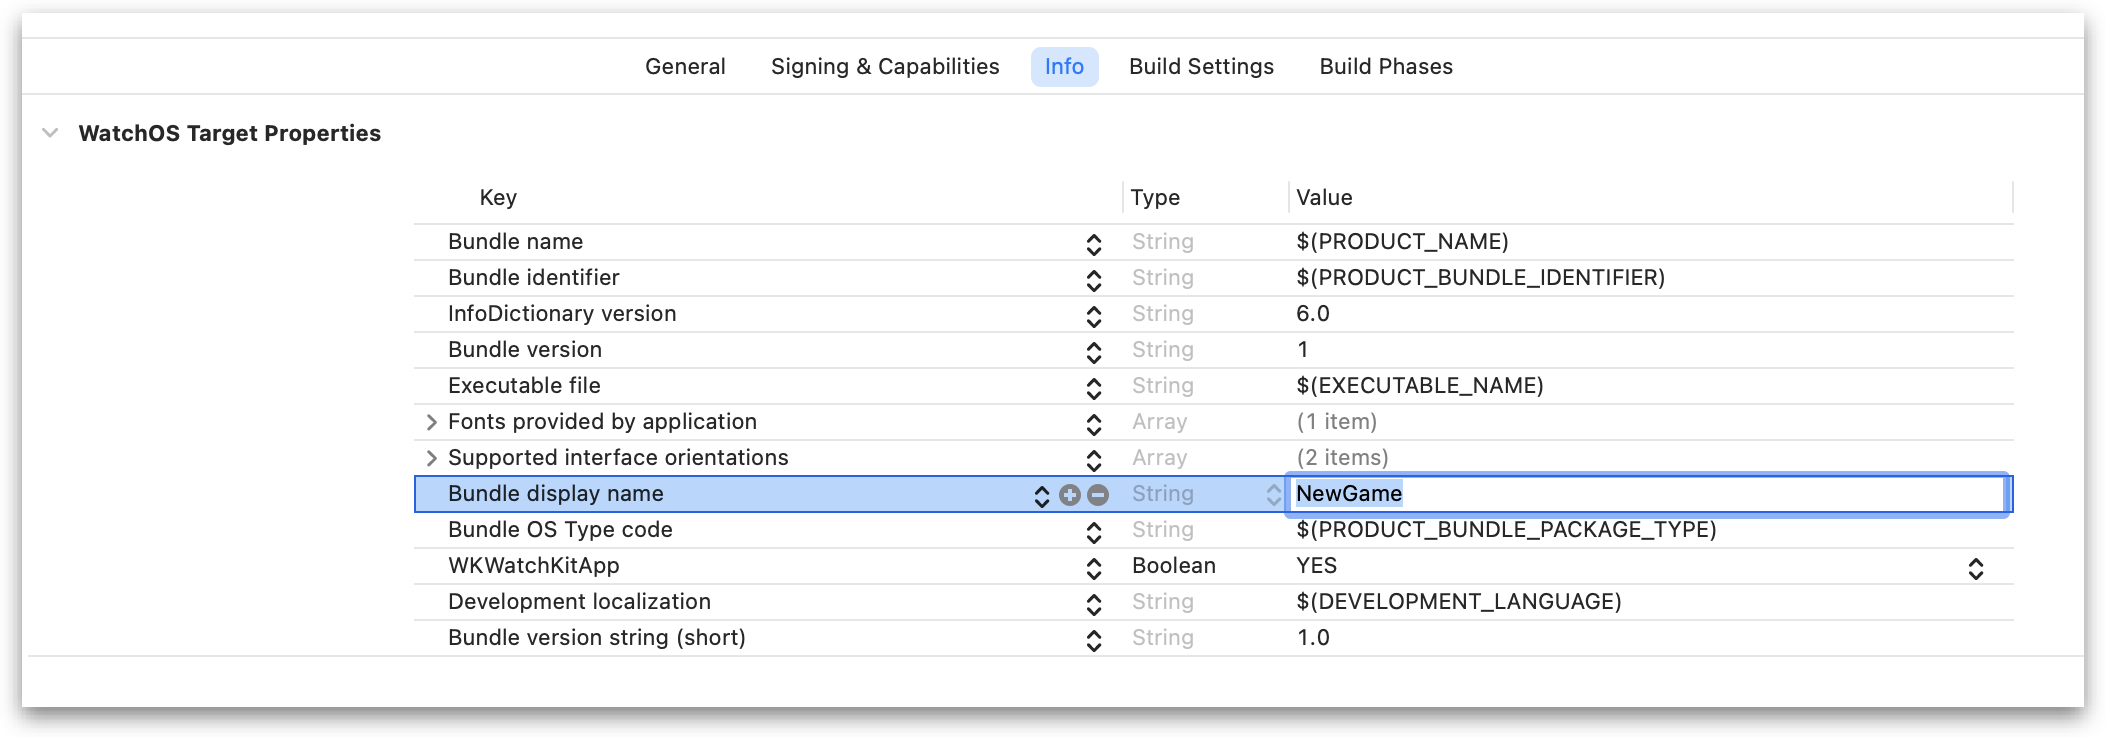
- Update the Bundle display under the Info tab for both App and Extension targets.
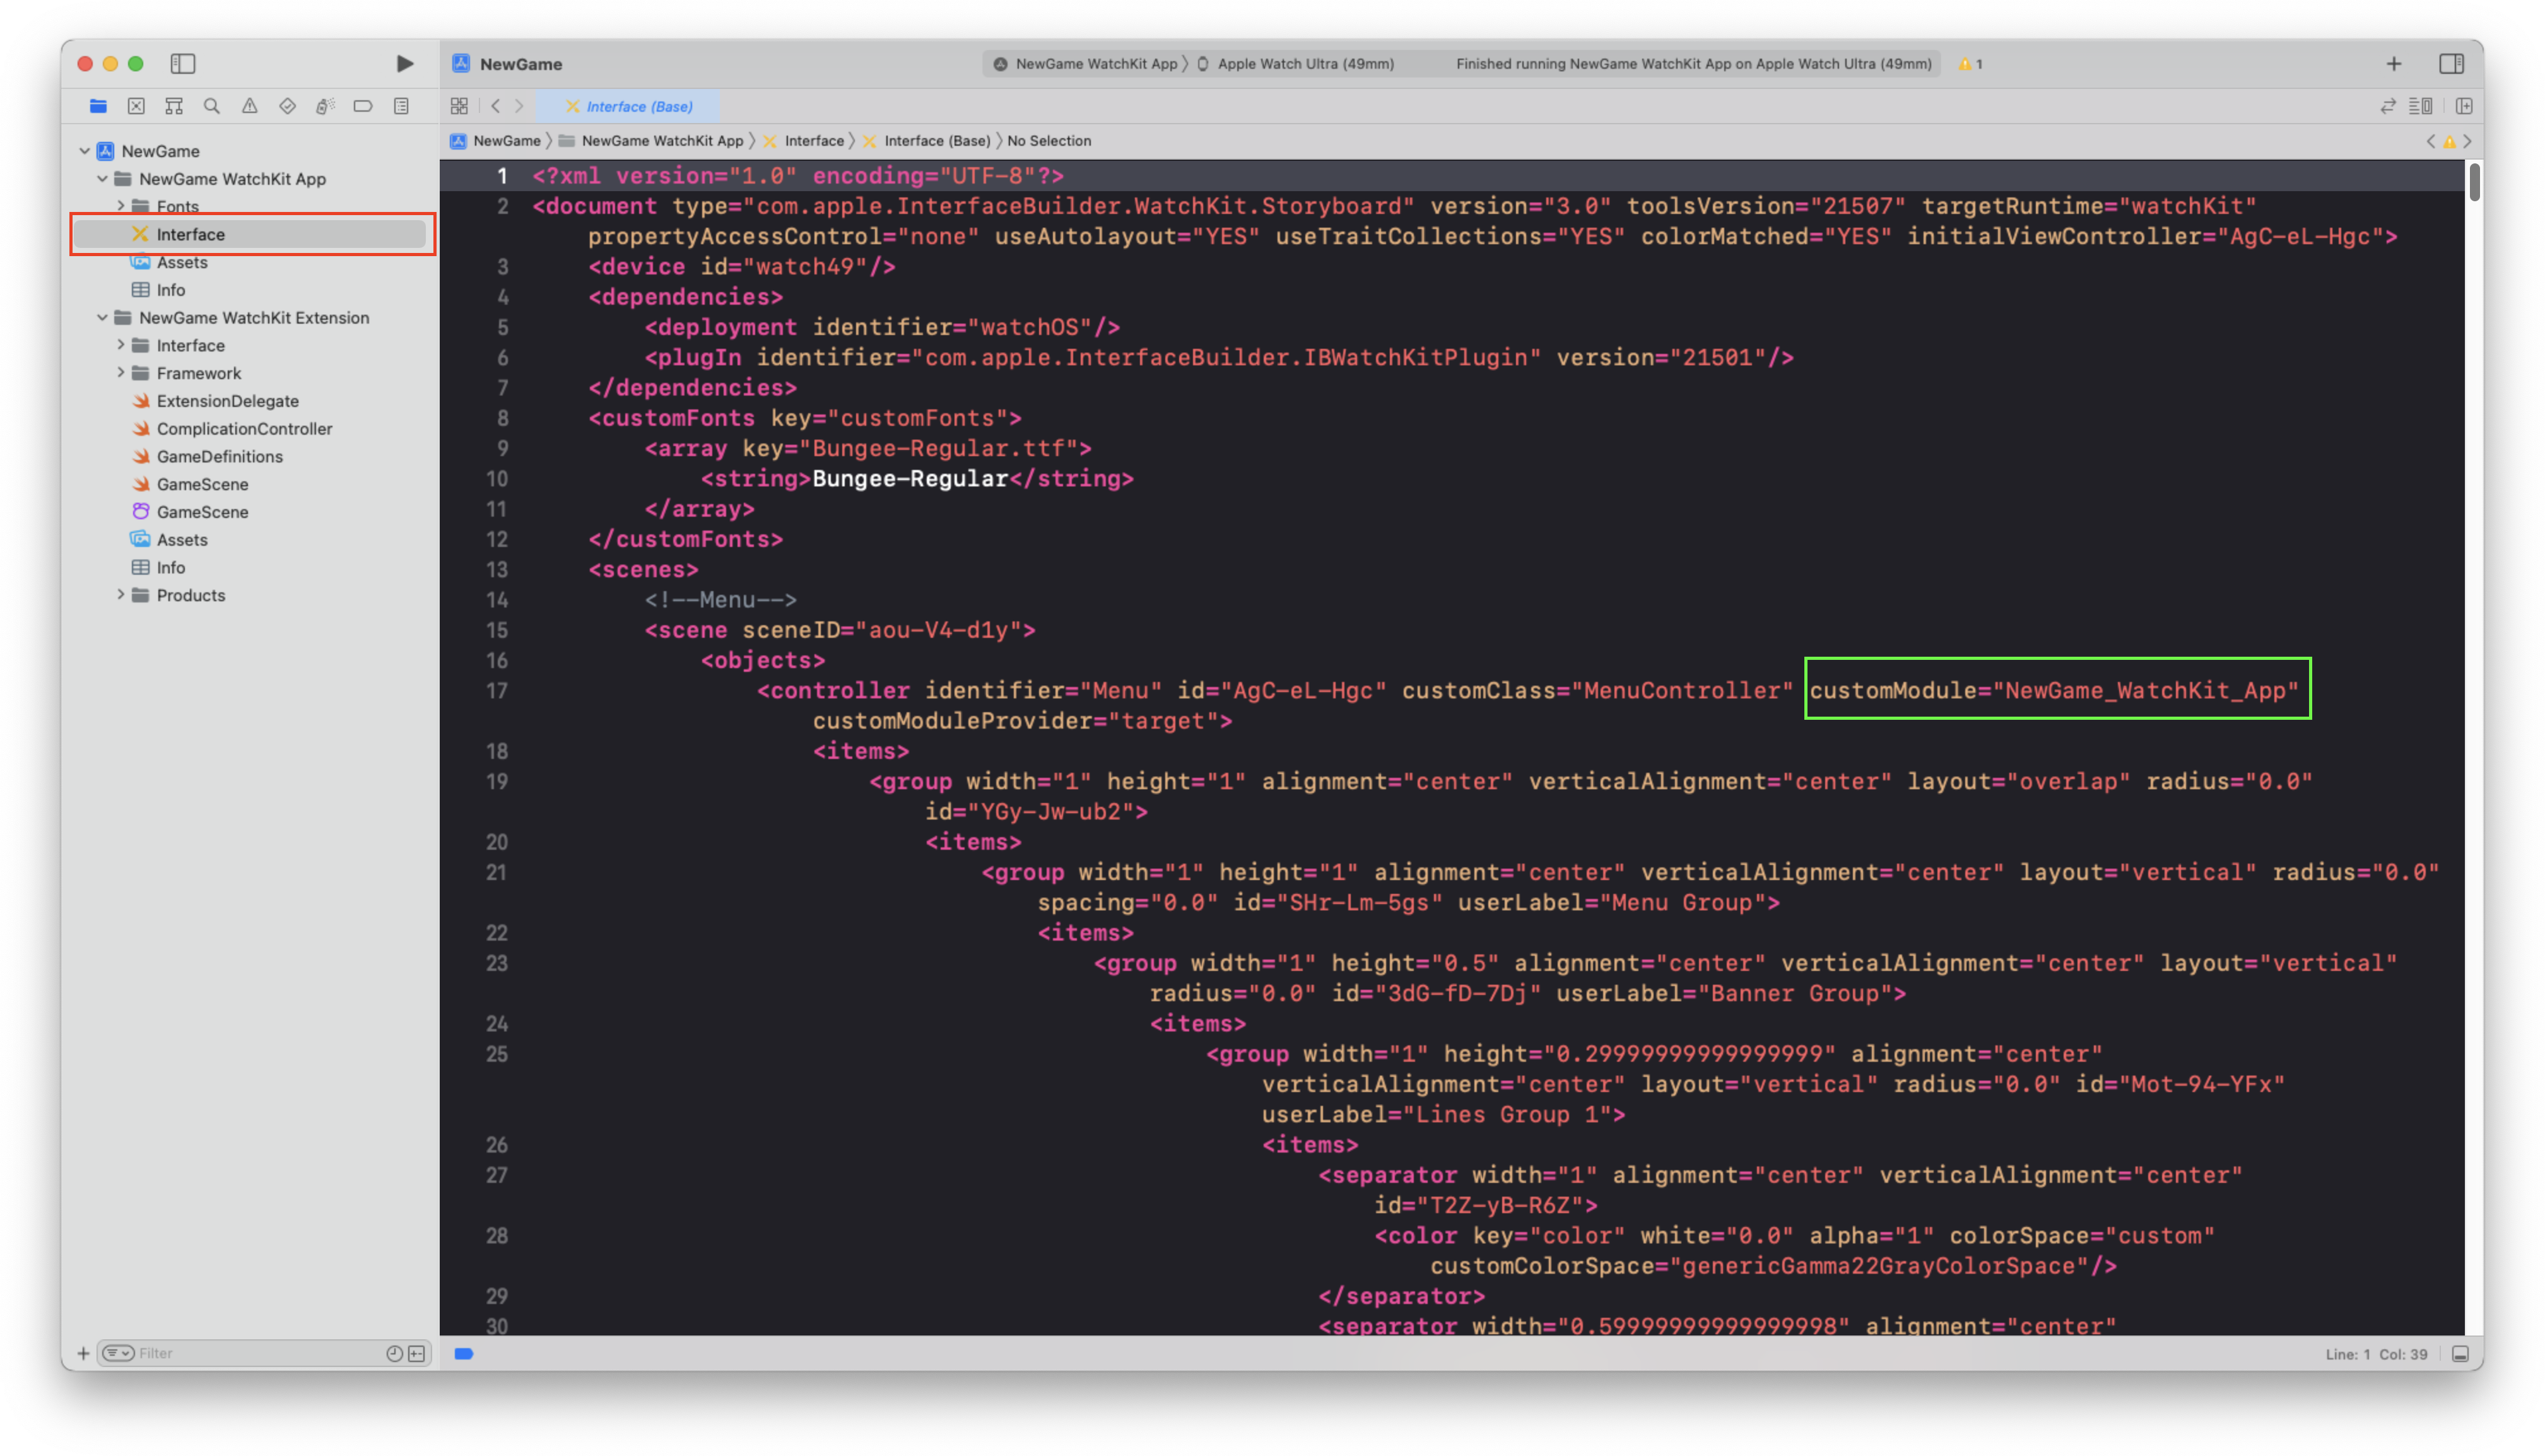
- Open the Storyboard interface in source view, and rename the old names with ‘WatchKit_App’ and ‘WatchKit_Extension’ in the name.
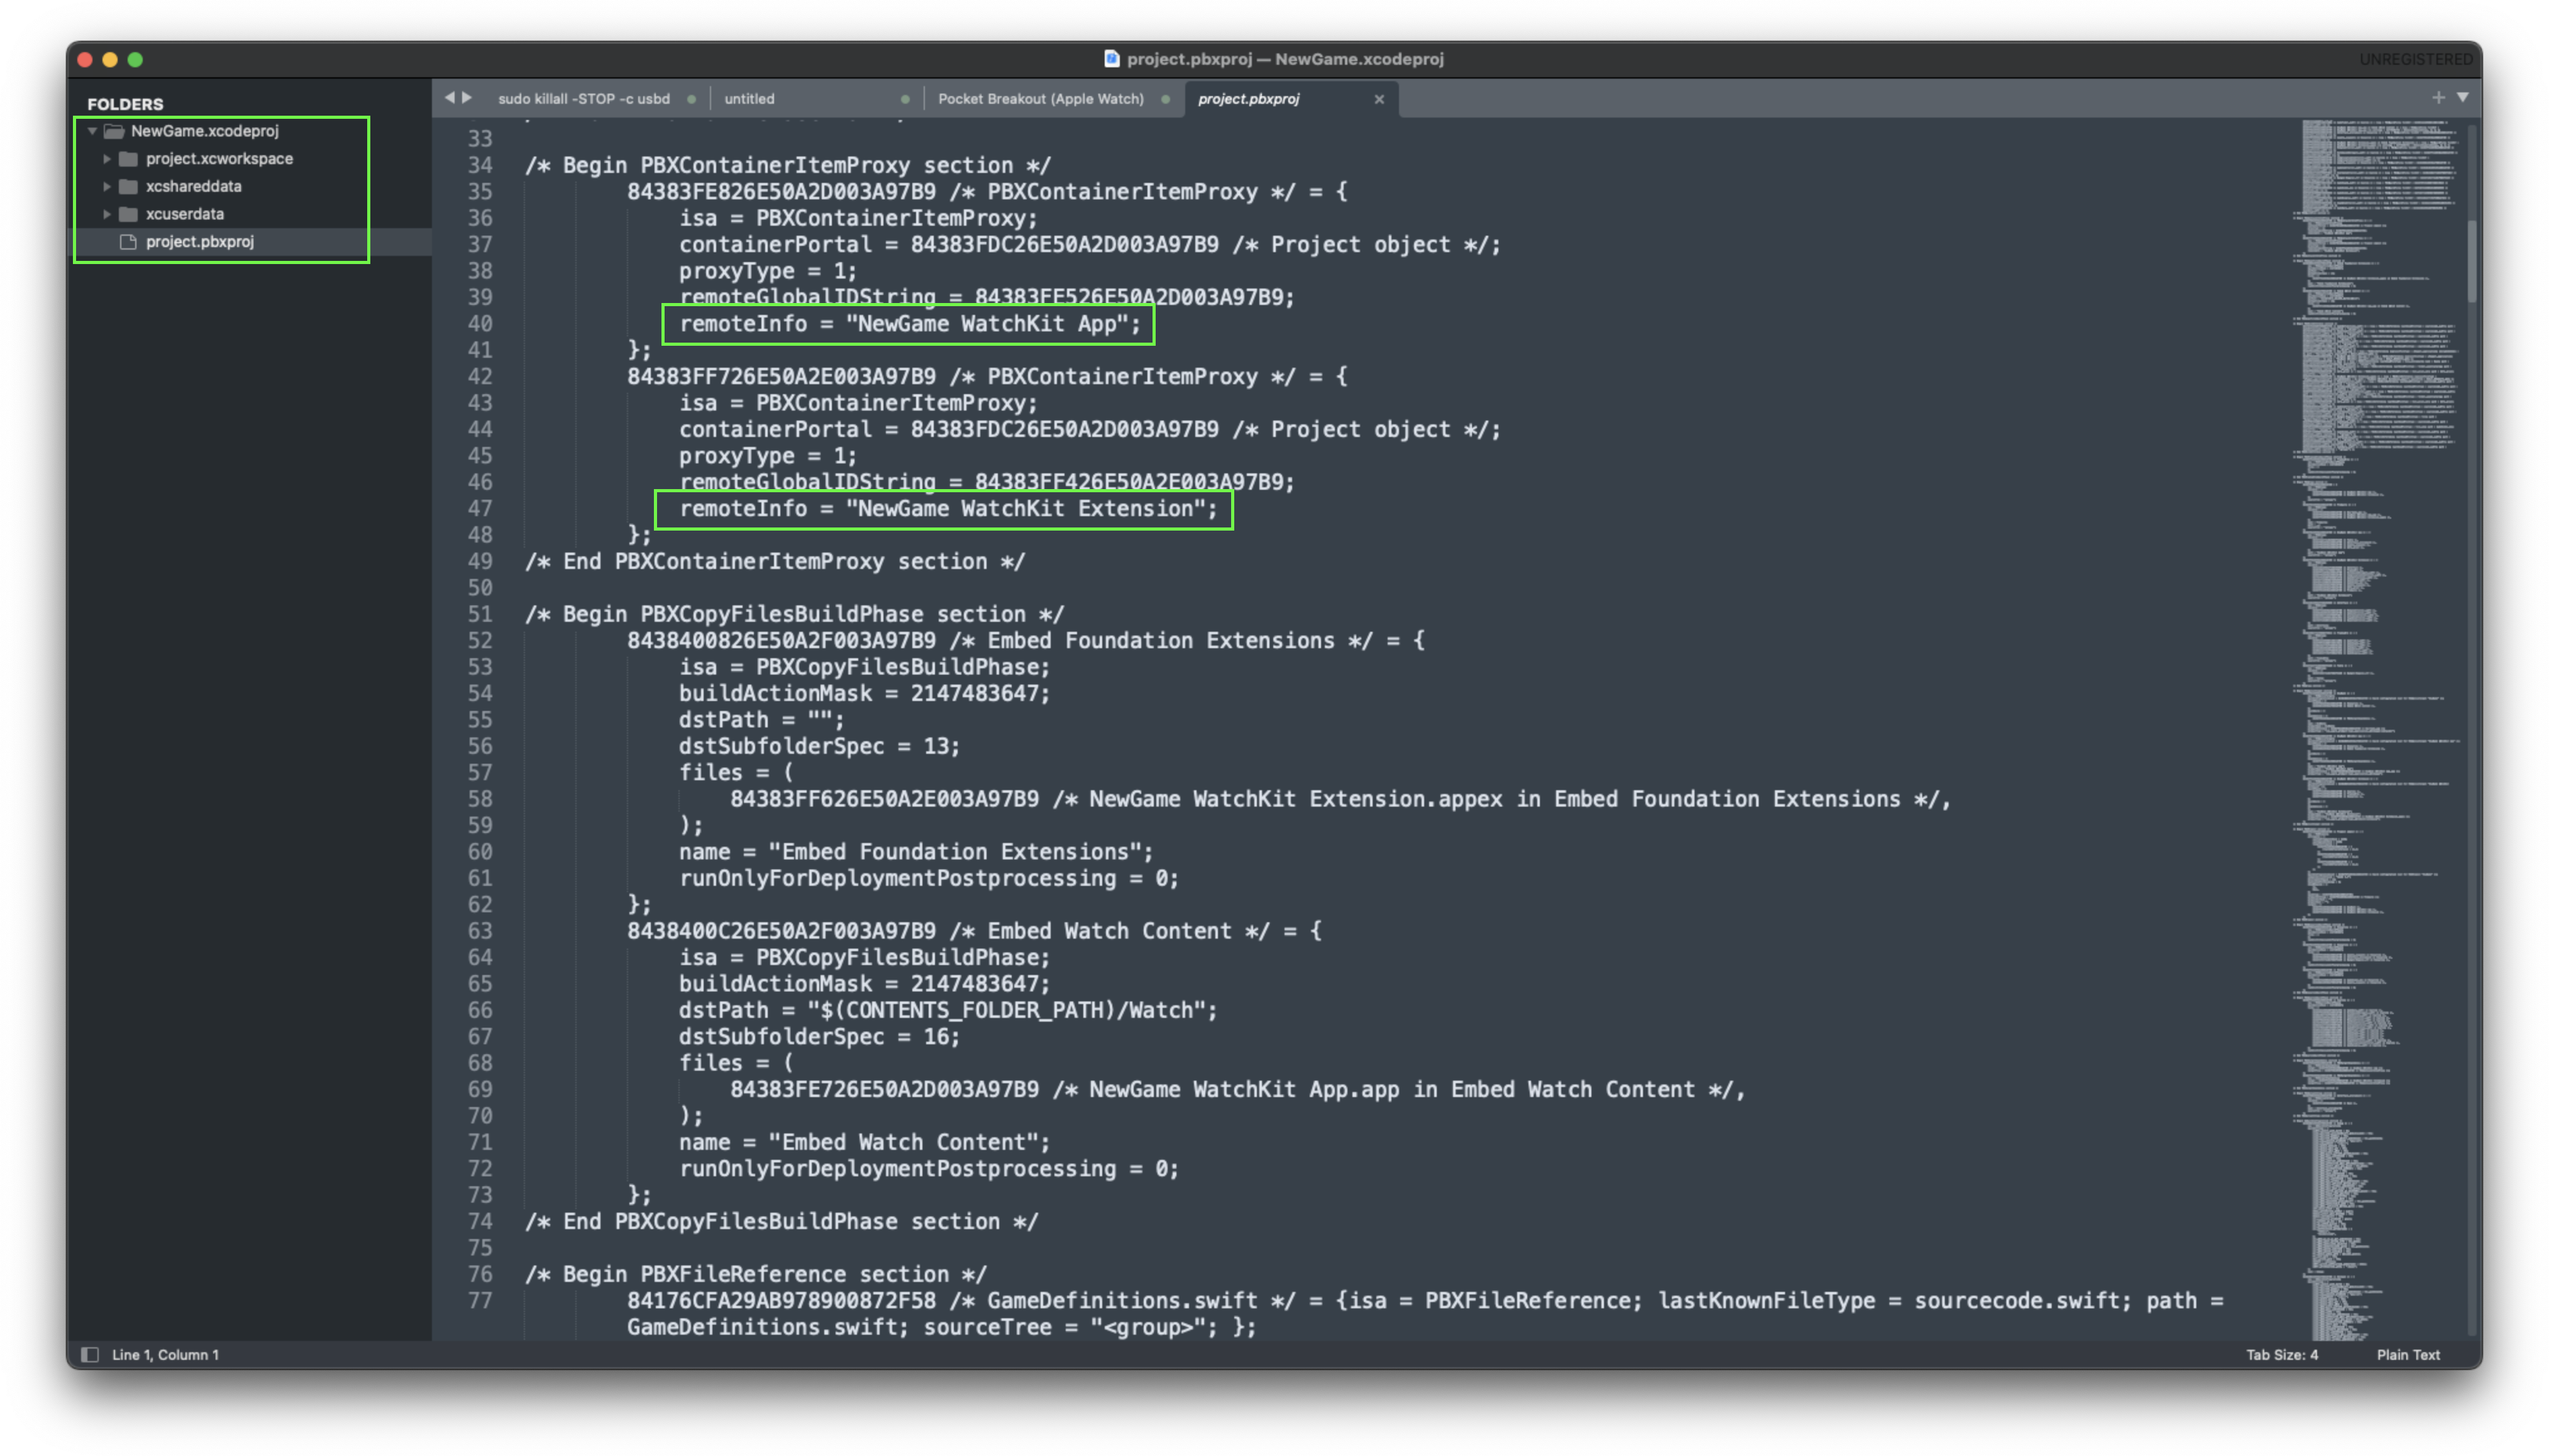
- Close Xcode and open the project folder in a text editor. Find and update any files with the old name listed.
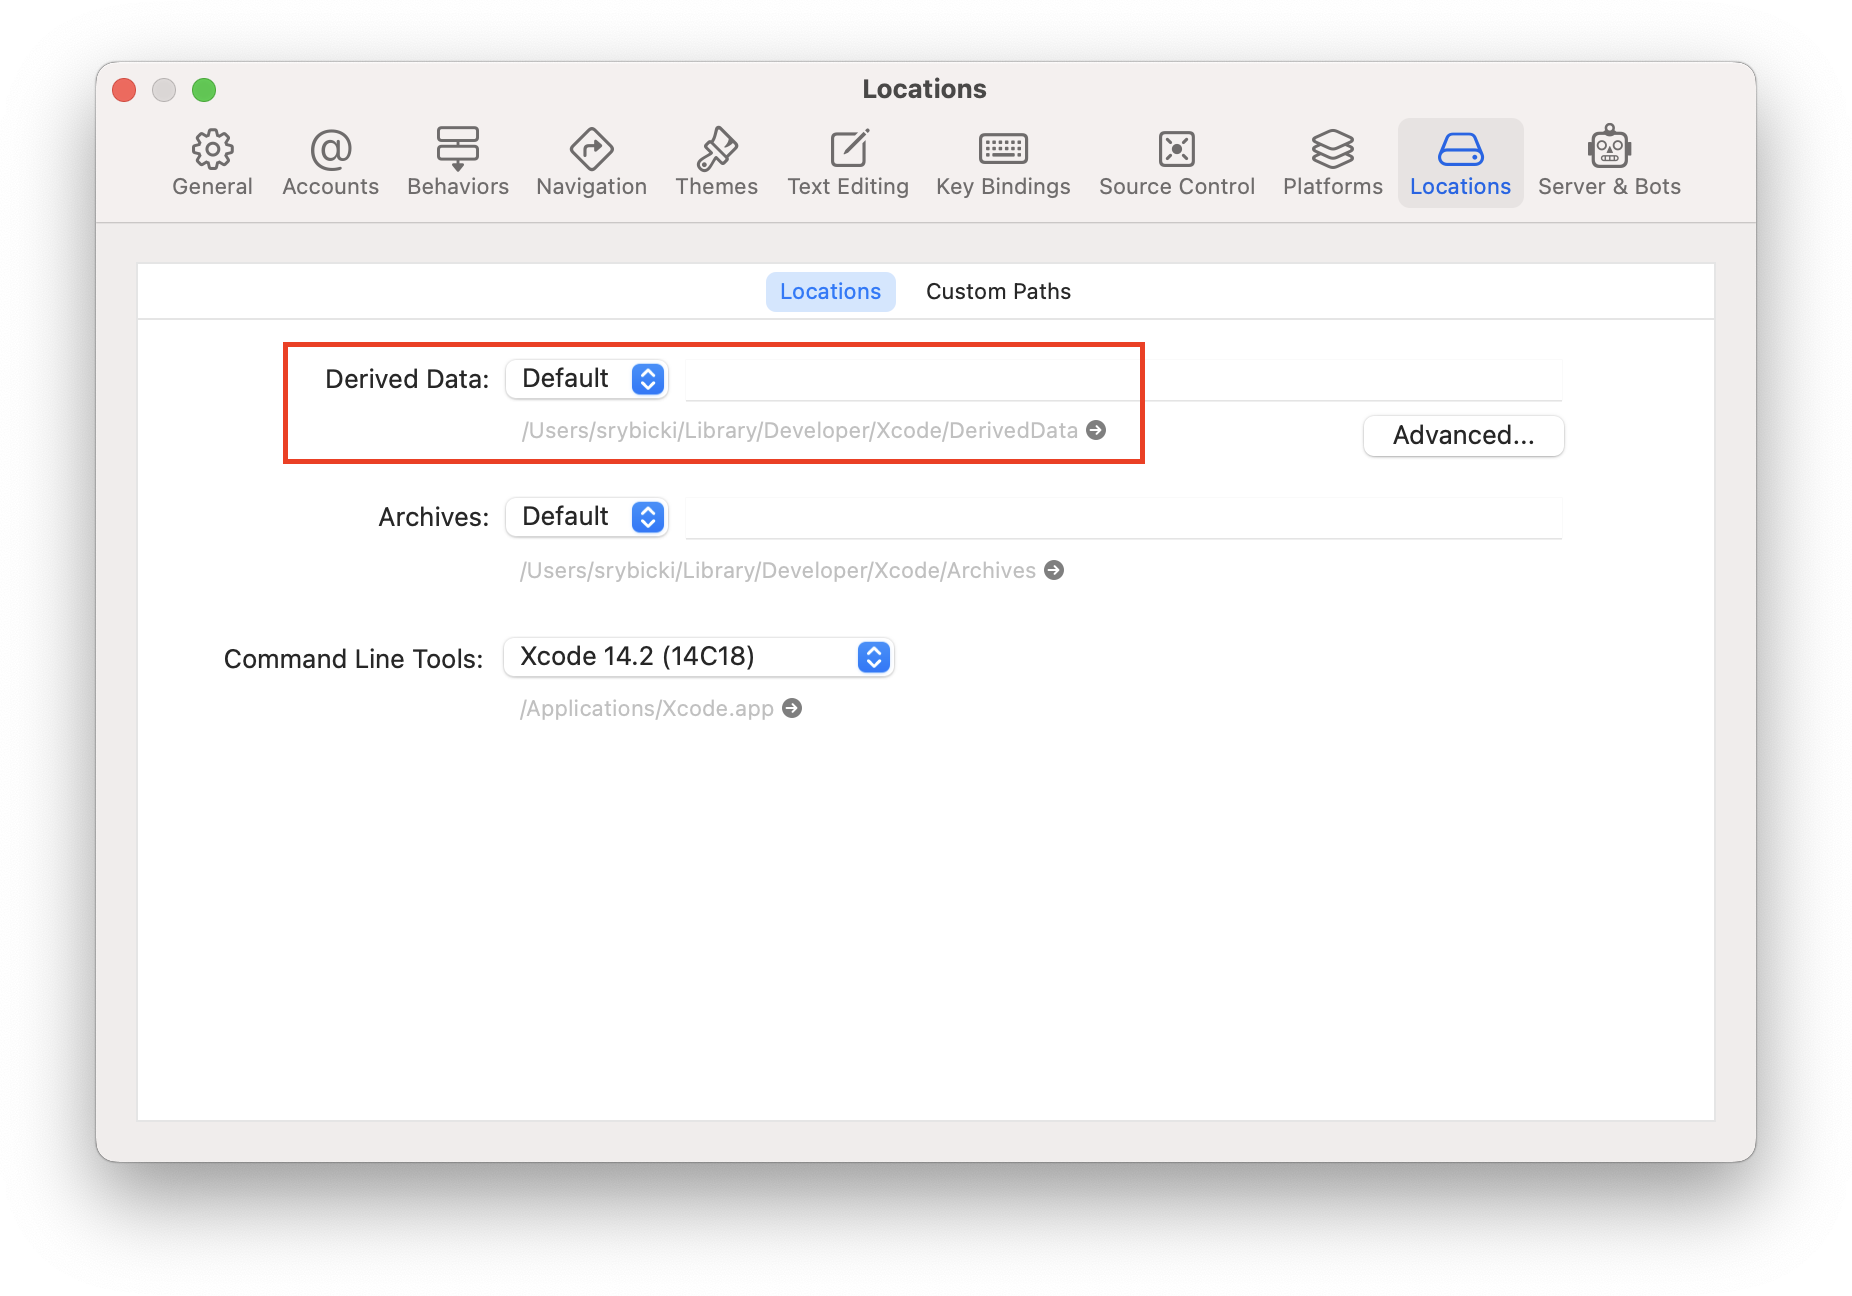
- Open the project in Xcode. Open Properties and Locations. Find and delete the old derived data (old project folder).
- Clean the project (Command-Option-Shift-K).
- Build the project (Command-B) to validate that there are no errors.
Be patient
A popup confirmation window will appear with a rename button. After pressing rename, it may take a good few seconds depending on the size of the project.